
Gmail is the most used email service on the planet. It’s easy, secure, and intelligent. Millions trust it every day. As they send and receive important work, school, and personal correspondence. Sometimes, though, you don’t necessarily want to forward all of it to another email account, you may only want to auto-forward specific messages.
That is where auto-forwarding via filters in Gmail comes in very useful. You can forward specific emails alone, like your boss’s emails, clients’ emails, teachers’ emails, or payment receipts, without forwarding other emails.
Here, we will tell you what is auto-forwarding, why you can take advantage of it, and a step-by-step guide to performing auto-forwarding in Gmail to specific emails.
What Is Auto-Forward in Gmail

Gmail auto-forward is a process where you can auto-forward a copy of all your incoming emails to another mail address. Forward all your emails or set some filters which forward some emails.
For example:
- You’d like your boss’s emails to be forwarded to your Gmail so that you won’t miss them.
- You’d like any email with the subject “Invoice” forwarded to your finance team.
- You’d like your school work forwarded automatically to a backup email.
This way, you don’t have to forward all your emails. Gmail does it for you.
Why Forward Only Specific Emails?
It is perhaps not a good idea to send all your emails. Following are some of the reasons why sending all but not all your emails is the best idea:
- Save time – Your precious emails get delivered.
- Be organized – Emails can be separated between school, work, or personal emails.
- Avoid clutter – Do not send spam, adverts, or unwanted emails.
- Backup favorite emails – Save your beloved emails in another account always.
- Share responsibility – Automatically forward client or project emails to a buddy.
Now let us go step by step about it.
Add a Forwarding Address
Begin by adding and verifying the email address. As it needs to receive forwarded messages.
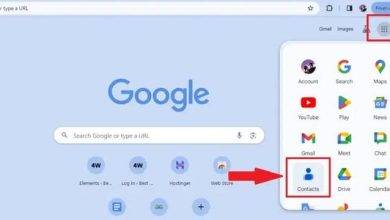
- Launch Google’s Gmail.
- Click on the gear icon (Settings).
- Click See all settings.
- Click Forwarding and POP/IMAP.
- Under the “Forwarding” heading, click Add a forwarding address.
- Type the forwarding email address.
- Click Next, then Proceed.
- Gmail will send an automatic verification code in the email address.
- Open the second email account, cut and copy the code, and paste it into Gmail.
Your forwarding address is established. You can now use it on your filters.
Create a Filter for Specific Emails
Having established your forwarding address, you then create a filter to tell Gmail to forward what email.
- Return to Gmail.
- Click the down arrow at the topmost box and select advanced search.
- Establish your filter criteria. For example:
- From: [email protected] (to forward boss emails)
- Subject: Invoice (to forward all invoice emails)
- Has the words: assignment OR homework (to forward school emails)
Type the information, then click Create filter.
The filter only selects the messages that you would like to forward.
Automate the Filter to Forward
You now associate the filter with the forward address.
- In create a filter menu, choose the box Forward it to.
- Click on the forward address that you’ve already established.
- Click Create filter.
Now only emails that match your filter rules get automatically forwarded by Gmail.
How to Edit or Delete the Forwarding Filter
At times you will want to change what emails are getting forwarded.
- Open Gmail’s settings.
- Click on Filters and Blocked Addresses.
- Find the filter you’ve created.
- Click Edit to change or Delete to remove it.
This gives you full control of your auto-forward rules.
How to Disable Forwarding Entirely

When you don’t wish to auto-forward further emails:
- Proceed to Gmail settings.
- Click on the Forwarding and POP/IMAP button.
- In the Forwarding area, click on Disable forwarding.
- Save the changes.
This will turn off Gmail auto-forward mail.
Examples of Auto-Forward Use
To give you an idea of how to use Gmail’s auto-forward option, some great examples of how people use it are given below:
- Work mails – Auto-forward all client mails with the subject line “Project Update” to your manager.
- School emails – Auto-forward all reminder emails for assignments to your alternative email address.
- Finance emails – Auto-forward all emails with “Invoice” or “Payment” in the subject line to your accountant.
- Shared accounts – Auto-forward from a shared mailbox to many individuals using Google Groups.
- Family – Auto-forward flight booking confirmation to your partner so they remain aware.
Problems and Solutions
Auto-forwarding does not work. Below are the most typical issues:
- Didn’t receive verification email – Check the spam folder of the forward address.
- Filter not working – Re-check filter criteria. Use simple keywords instead.
- Can’t forward to more than one address – It only supports a single forwarding address. Forward to other people by setting up a google group. And forward email to that group.
- Forwarded spam – Alter filters with caution so that only relevant emails are forwarded.
- No forwarding option available – Your administrator might have disabled forwarding if you are doing it through Gmail at work or school.
Smarter Email Forwarding Tricks
- Use labels with filters so that the forwarded mail gets categorized in Gmail as well.
- Save a copy in Gmail by checking “Keep Gmail’s copy in inbox” under preferences.
- Use multiple filters as an additional safety measure in case you might need to forward different types of emails.
- Change your filters from time to time to accommodate your individual then-current requirements.
- Never automatically forward sensitive data to non-secure email addresses.
Why Auto-Forward is Useful at the Workplace and in School
Auto-forwarding is not only time-saving—it is a productivity enhancer.
- At the workplace – Important emails from managers or customers end up in the intended individual’s mailbox immediately without time wastage.
- For students – Homework and class reminders are auto-forwarded to a personal or backup mail.
- For teams – It’s easier with shared responsibility because everyone receives the same vital emails.
- For business – Invoices, reminders, and client questions get automatically sent directly to the concerned department.
It never leaves you bored and never makes you miss what counts.
Configuring auto-forward for a few emails is simple and easy. You can make sure only priority emails are auto-forwarded with a few simple steps.
With forwarding and filters, you can:
- Save time
- Be well-organized
- Share important emails with the right people
- Take backups of valuable information
If you would like to stay one step ahead of your communications. Then take a few minutes today enabling auto-forwarding. You’ll never worry about missing a crucial message again afterwards.